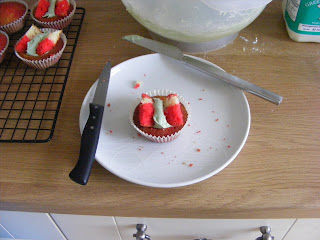
After the work we have done on Eric Carle and 'The Very Hungry Caterpillar' Boy felt inspired to make some butterfly cakes. We have done this many times before and the very simple recipe we use can be found at this post called 'Fairy Cake Fun!'
The ones we made to day are coloured ones. We have never done them like this before and usually leave them plain but today we felt we wanted to have a go at them in a different way and see what happened. We followed the recipe in the usual way and then split the mixture into two. We left one plain and coloured the other red.
A tip I have learned is that 'natural' food colourings do not hold their colour very well when baked. This is especially true of red which goes brown when cooked. We used an 'unnatural' one to get the colour we wanted. You could just mix some cocoa in if you want to go for something without the E numbers. Or experiement with different brands of colouring and see if there is one which works better. If you find a good 'natural' red colouring please let me know too!
Put one teaspoonful of plain mixture in one side of the cake cases and the a spoonful of the coloured mixture in the other side.
Then use a cocktail stick to swirl the mixture round a bit and make some patterns.
Then bake for 15-20mins at 180 degrees until cooked.
Once cooled make the icing. Ingredients; 50g butter, 100g icing sugar, colouring (we used green), a tsp of milk. Whisk all the ingredients together until the icing is light and fluffy!
Then cut a disk from the top of each cake, carefully spoon in some icing. Then cut the disk in half and place the two halves into the icing to create the butterfly wings.
These turned out well and the colour is really bright. Boy really likes the look of them anyway, which is what matters! It has also been a nice way to be able to talk about the life cycle of butterflies after doing the caterpillar artwork yesterday.


No comments:
Post a Comment