I thought I'd take a few moments out to write a little bit about heuristic play. This is something which sounds really complicated and involved but which is actually one of the easiest types of play activities you can do with young children. All it really means is playing with and exploring objects. Some examples might include playing with cardboard boxes, tearing up paper, banging pots and pans to make music.
If your child is between about 5-6 months and 18 months then Treasure Baskets can be a lovely way to engage with them in play. The concept is very simple, go round your house and gather objects which the child can then explore. Then sit them down with the basket (or box, you can use container really) and let them have a look.
Here's one I put together using what I would describe as 'natural' objects. It includes; an egg box, cardboard tube, cotton buds, wooden bricks, a cotton reel, wool, clothes peg, a couple of wooden spoons, a paint brush, a pastry brush, a terracotta pot and a wicker coaster.
This one just contains fabrics. Includes; grosgrain ribbon, satin ribbon, ric rack, lace, cotton tape, a flannel, wool, a sponge and a selection of bits of fabric with different textures.
This one is for 'shiny' things. Includes; a whisk, measuring spoons, teaspoon, tin foil, a bracelet, a CD, a small spanner, tea strainer, keys, metal chime and some shiny ribbon.
You don't have to theme the baskets, just go with whatever you have! Just experiment and let your baby do the same.
Wednesday, 30 March 2011
Tuesday, 29 March 2011
Planting & Growing Project
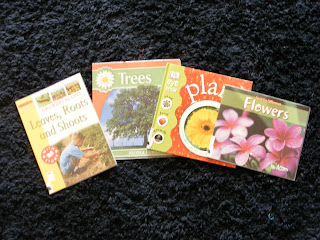
Having spent a whole week looking and bubbles we're moving on to a planting and growing project now. There are loads of play and learning opportunities with this particular theme and so I anticipate that this will run for a couple of weeks. First, we took a trip to the library in the local town to return our bubble books and get some books about all things green fingered.
There was a lot to choose from! On the way home we went to one of our local garden centres to choose some seeds and other goodies for the garden.
For the last few years we've made a bee garden. Put simply, it's an area where we plant bee friendy seeds and usually add some kind of bee decoration. In the past we've also made a bee house using bamboo canes but the bees have never made a home there so this year we're just sticking to the plants. You can buy packets of mixed wildflower seeds at garden centres and these are ideal for this. We got a packet of 'creepy crawly' seeds by Unwins (aimed at children!).
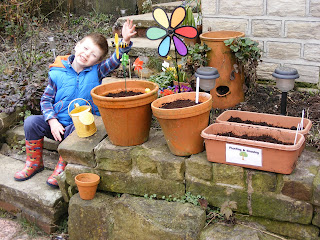
We don't have a large garden but even in our small patch we like to have a go at growing edible plants. Boy chose spring onions, mixed salad leaves, radishes and carrots. We are growing all of them in pots. It's nice to be able to show children where their food comes from, even if it's only enough for one meal!
Boy also chose a plant which we've potted up. He liked the look of it, and wanted to take care of it.
Girl was having her sleep time whilst we did all of this so I've kept one or two things back to do with her at a later date. Our garden in certainly looking brighter now that plants are popping up.
Monday, 28 March 2011
Play dough again
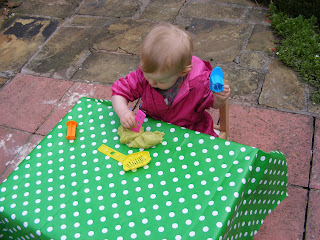
Boy goes to nursery after toddler group on a Monday and so Girl and I have some one-to-one which is really nice. We brought home some of the herb play dough that we made for toddlers and went outside to play with it this afternoon.
You can see the deep concentration on her face! She played for a good 45 mins and we only had to stop because I needed to begin getting the tea ready. So annoying when daily life interrupts play!
It's a great opportunity to talk and interact when children are playing like this. We talked about all the different shaped cutters we were using and also the birds and insects we could see and hear in the garden. There is so much more to play than just play, if that makes sense. Children are taking everything in, even if they don't show it.
Sunday, 27 March 2011
Play dough
I'm a big fan of play dough. It supports children's play and development in so many ways and it's really cheap and easy to make. You can do so many things with play dough. Role play games such as making cookies and cakes or other baking/cooking; experimenting with different textures, smells, colours (you can make the dough more interesting by adding extra ingredients to the recipe); molding new shapes also helps children develop the muscles they will later use to hold a pencil and write.
Here's a nice easy recipe for playdough. This is quite a large quantity. 3 cups water; 3 cups plain flour; 1 1/2 cups salt; 2 tbsp cream of tartar; 3 tbsp veg oil; food colouring of your choice. Put everything in a large pan and over a low heat and heat gently until stiff. Knead on a clean surface until smooth. Done!
Here's some I made this evening. You can add all sorts of things to your dough. Glitter, sand, seeds, smells (herbs, food flavourings such as vanilla, cocoa, peppermint etc). I've made this dough for our toddler group. Our theme at the moment is planting and growing so I've coloured this dough green and mixed in some dried herbs to make it smell nice and give it a 'plant like' feel.
Another great idea for a play dough activity with slightly older children (3-4 years) is to use play dough mats. I found these on an excellent website called Sparklebox. It is really a teaching resource sight but there are also some good resources for parents.
In this one the children build a plant using the play dough to make branches and leaves.
There are many more of these on the Sparklebox site. Happy play dough-ing!
Saturday, 26 March 2011
Importance of outdoor play
Playing outside is a really special thing. Young children need to play outside and it's amazing how much they get out of it. Being outdoors offers children opportunities they would never get inside. They can be much free-er in their play by being noisy, messy, and having space to move in a different way.
We have been trying to improve the opportunities for play in our small garden for the last couple of weeks. We wanted to give Boy and Girl more than just balls and skipping ropes. Water and sand are an obvious choice for outdoor activities. We have had a sand and water tray for a few years and so this has been cleaned up.
We have decided to use this just for water as it works much better than for sand which seems to block up the funnels! Instead we have made our own sand tray using a fruit box we picked up for free at the local farm shop. We've put a bin liner in the base to stop the sand escaping and then taped it down. It works a treat!
Play sand can be bought from supermarkets quite cheaply and you can pretty much chuck in any plastic toys you happen to have or use things from the kitchen (spoons, jugs, cups etc). You could go for more natural things like shells, pine cones, pebbles. Get creative and go with your child's interest.
Girl really enjoyed playing with the sand for a while before lunch today.
Boy showed his sister how to make a sand castle and she was very interested in this idea.
Boy went inside to help make the lunch but Girl stayed playing with the sand for a while.
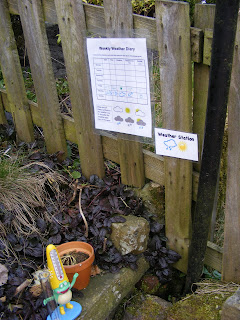
We have also set up a weather station where Boy can measure and record the weather each day.
We found this weather kit in Asda for £5. It includes a thermometer, rain gauge and a weather diary sheet.
We got a wind sock as well for good measure.
I guess it's about making the most of the space you have outside. Even if it's only a balcony or a small yard there is still quite a bit you can do. We are adding a writing, drawing and painting area and I've begun planning some music making things too. I'll take plenty of pictures when we've finished.
Friday, 25 March 2011
Outdoor gallery and afternoon in the garden
We settled on a 'washing line' style gallery against the fence. We have plans to put an interchangeable chalk board, whiteboard, painting board up against this fence. Mr M will be converting a wooden easel we bought some years back and have hardly used. Hopefully we'll paint the frames of the board in some nice cheerful bright colours and then this will be a writing, drawing and painting area.
We've laminated these pieces of artwork so that they can stay out in the wet weather. Most of these are things we've done at home but the hand prints came from nursery. Boy and Girl attend an excellent nursery so it's great to be able to extend and link in with what they are doing there.
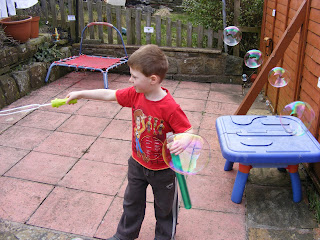
Whilst we were grocery shopping this morning Boy decided to spend some of his spending money on this giant bubble wand.
Later on he asked to do water balloons again so we spent some considerable time doing that before Girl woke up and joined us. We played outside for most of the afternoon making bubbles, playing in the water tray and riding bikes and scooters on the driveway. We've finished our week of bubble related activities but I'm sure we'll keep on playing with bubbles as the weather is that little bit warmer and we can get outside more. Next week I plan to begin some planting and growing projects including; sunflowers, a bee garden, sensory planting, and some vegetables and herbs.
Finishing off our week of bubbles
This afternoon Boy and I decided to make a few more bubble paintings. I had to keep reminding him not to suck on the straw. Girl did this the other afternoon and looked very shocked!
Once dry, we cut them out and stuck them into a mini collage. Then we stuck the 'Soap Bubbles' poem over the top. We think we might laminate it and then hang it up in the garden. We've been thinking about making a garden gallery. We used to have everything on the kitchen wall but since we had a new kitchen last spring I've been less inclined to fill it with all the children's masterpieces. We might fix them to the fence or hang them up on some string.
After I'd taken these Boy had a go on the camera. Producing some rather 'interesting' results.....
Thursday, 24 March 2011
Mark Making
Since having young children I have become interested in the ways they develop. In particular, encouraging them in pre reading and writing. Before children learn to write, they experiment with making marks of various kinds. Often this can be with pencils/crayons and paper but if you get a little bit creative, you can give them opportunities to make marks using different methods. Some examples are; using finger paints, a thin layer of salt or sand in a tray, in the soil. I'm sure you can think of more. Give your child the chance to use different tools to make marks; cutlery, cotton buds, sponges, brushes, whatever you can find!
I was clearing out some old art books I had as a teenager from my parents loft space and I came across an idea which is great for encouraging early mark making. You can see Boy and Girl having a go! Make a thickish batter using flour and water and add some paint. Spread a layer over a sheet of paper and then let the children make patterns and marks using a variety of tools. We used plastic cutlery, cotton buds, brushes, fingers and Mr M made some out of cardboard.
Boy especially enjoyed this activity and was keen to try and write his name. He doesn't usually want to do drawing so this is a good way of encouraging him to explore mark making. Wearing his cowboy apron here!
Girl is a fan of drawing anyway so she really took to this too. Once the pictures/patterns are finished and dry you can cut them up and use them to make cards or gift tags, or just add them to your children's gallery!
Subscribe to:
Posts (Atom)


